
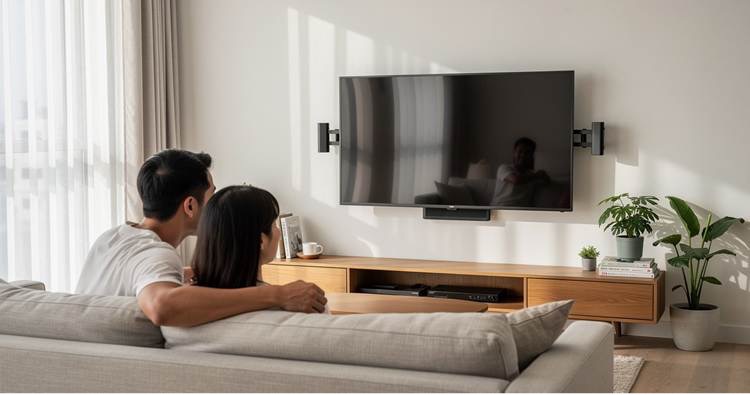
You bring home a new screen, set it up, and sit back to watch. But something looks off. The colors seem washed out, the window glare is blinding, and you find yourself squinting. Before assuming the screen is faulty, look at your room layout. Finding the right physical setup transforms your viewing experience.
Many households struggle with poor picture quality simply because of where their furniture sits. Whether you’ve recently purchased a television or chosen one through TV rentals, getting the placement right helps you enjoy the best possible viewing experience. This guide provides practical, zero-cost solutions to help you get the best performance out of your current setup.
Why TV Placement Matters for Picture Quality
Your physical environment directly dictates how your eyes perceive image quality. You could have the most advanced screen available, but if it sits too high, too close to the sofa, or opposite a bright window, the picture suffers. Proper positioning improves contrast, keeps the image sharp, and makes movie nights much more comfortable. When you get the placement right, the screen works with your room rather than against it. A few smart adjustments to your layout will unlock the true potential of the technology you already own.
How Far Should You Sit from Your TV?
Sitting at the correct distance plays a massive role in how much detail you see. Sit too far away, and you miss the fine textures. Sit too close, and your eyes work harder to track the action. For modern 4K displays, you can sit much closer than with older high-definition models.
A practical rule is to measure your screen size and multiply it by 1 to 1.5 for a 4K display. If you’re comparing a 55-inch TV and a 65-inch TV, using the recommended viewing distance for each size helps you achieve a sharper and more comfortable viewing experience. For older Full HD screens, sit further back, usually 1.5 to 2.5 times the screen size. Finding that sweet spot keeps you immersed while preventing eye fatigue.
| TV Screen Size | Recommended Viewing Distance (4K) |
| 55-inch | 5.5 feet |
| 65-inch | 6.5 feet |
| 75-inch | 7.5 feet |
Achieving the Perfect Eye-Level Viewing Height
A common mistake is mounting the screen way too high on the wall. Position the exact center of the screen so it sits at your natural eye level when seated on the couch. This alignment keeps your gaze relaxed during extended viewing sessions. To get this right, sit in your usual spot and measure the distance from the floor to your eyes. For most standard couches, this ideal center point lands between 90 and 110 centimeters off the floor.
- Wall mounting gives your room a clean look and allows you to set the exact height you need, though it requires drilling into studs and taking very precise measurements.
- Traditional entertainment units provide excellent flexibility for height changes, make cable management incredibly easy, and are perfect if you are renting your home.
- Tilting wall mounts offer a great compromise if your room layout forces you to place the screen slightly higher than eye level, allowing you to angle the display downward.
How Can You Reduce Glare and Reflections on Your TV Screen?
Nothing ruins a daytime movie or a weekend sports match quite like a massive reflection right in the middle of the action. Glare washes out the deep black levels, destroys contrast, and forces your eyes to work overtime. To fix this, position your screen away from direct sunlight and bright indoor lamps. The most effective strategy is the 90-degree rule. Place your screen on a wall that runs perpendicular to your main windows so the incoming sunlight hits the wall beside the screen rather than bouncing directly off the glass.
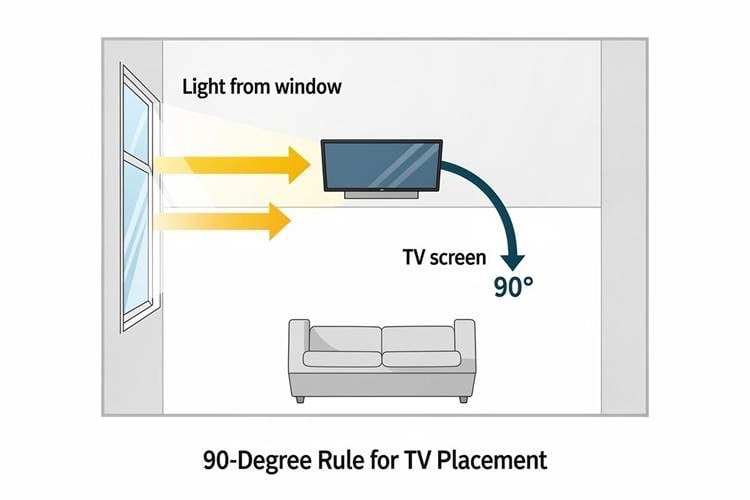
Diagram showing the 90-degree rule for TV placement to avoid glare from a window.
Improving Room Lighting for Better Picture Quality
The lighting in your room has a massive impact on how your brain perceives the picture. Instead of turning off every light, try dimming your overhead fixtures to reduce screen washout while keeping a low level of ambient light. One of the best tricks is to use bias lighting. This involves placing a small, soft light source directly behind the screen. The gentle glow on the wall behind the display tricks your eyes into perceiving the blacks on the screen as deeper and richer, significantly improving contrast while making long viewing sessions much more comfortable.
Adjusting TV Settings for Better Picture (No Equipment Needed)
A few simple adjustments to your TV’s built-in settings can noticeably improve picture quality without spending any extra money. These quick changes help optimise brightness, colour, and clarity to suit your viewing environment and the content you’re watching.
- Select the Cinema, Movie, or Filmmaker mode in your settings menu. These profiles turn off artificial processing and provide the most natural color reproduction intended by the director.
- Adjust the backlight or brightness settings to match your specific room conditions. Turn it up for bright daytime viewing and lower it for dark movie nights.
- Turn down the sharpness setting significantly. Pushing it too high actually adds artificial halos and digital noise around the edges of objects on the screen.
- Change the color temperature to a warm or neutral setting. This might look slightly yellow at first, but it actually provides the most realistic skin tones and accurate hues.
Viewing Angle and Seating Alignment
Where you place your couch is just as important as where you place your screen. Viewing a display straight on preserves the maximum color accuracy, brightness, and contrast. If you sit too far off to the side, the image quality degrades rapidly. Older LCD panels especially tend to look washed out and gray when viewed from an angle.
This becomes even more important with larger displays such as a 75-inch TV, where a centred seating position helps everyone enjoy a consistent picture. To get the best results for everyone in the room, arrange your primary seating so that all viewers sit within a 30-degree angle of the center of the screen.
Maintaining Your TV: Screen Cleaning and Cable Management
A dirty screen will ruin even the most perfectly calibrated picture. Dust, fingerprints, and smudges catch the light, reduce overall clarity, and create distracting hotspots during bright scenes. Clean the glass gently using a dry, clean microfiber cloth. Never use harsh household chemicals or window cleaners, as these can permanently strip the protective anti-glare coating right off the display. While you are tidying up, take a few minutes to organise the messy cables hanging behind the unit. Wrangling those cords with a few cheap zip ties prevents visual clutter and keeps pets safe.
FAQs

Reviewed by
Dean Hawes has more than nine years’ experience in Australia’s consumer leasing industry and reviews our content to help ensure it is accurate, practical and up to date. Drawing on his expertise in consumer leasing, affordability assessments, and household appliance and furniture rental, he helps Australians make informed leasing decisions.